Selecting A Kernel
The kernel is the part of the operating system that provides hardware access, process control, and overall system control. The kernel contains support for your hardware devices, so picking one for your system is an important setup step.
Slackware provides around sixty precompiled kernels that you can pick from, each with a standard set of drivers and additional specific drivers. You can run one of the precompiled kernels or you can build your own kernel from source. Either way, you need to make sure that your kernel has the hardware support your system needs.
The /kernels Directory On The Slackware CD-ROM
The precompiled Slackware kernels are available in the /kernels directory on the Slackware CD-ROM or on the FTP site in the main Slackware directory. The available kernels change as new releases are made, so the documentation in that directory is always the authoritative source. The /kernels directory has subdirectories for each kernel available. The subdirectories have the same name as their accompanying boot disk. In each subdirectory you will find the following files:
| File | Purpose |
|---|---|
| System.map | The system map file for this kernel |
| bzImage (or zImage) | The actual kernel image |
| config | The source configuration file for this kernel |
To use a kernel, copy the System.map and config files to your /boot directory and copy the kernel image to /vmlinuz. Run /sbin/lilo(8) to install LILO for the new kernel, and then reboot your system. That's all there is to installing a new kernel.
The kernels that end with a “.i” are IDE kernels. That is, they include no SCSI support in the base kernel. The kernels that end with “.s” are SCSI kernels. They include all the IDE support in .i kernels, plus SCSI support.
Compiling A Kernel From Source
The question “Should I compile a kernel for my system?” is often asked by new users. The answer is a definite maybe. There are few instances where you will need to compile a kernel specific to your system. Most users can use a precompiled kernel and the loadable kernel modules to achieve a fully working system. You will want to compile a kernel for your system if you are upgrading kernel versions to one that we do not currently offer in Slackware, or if you have patched the kernel source to get special device support that is not in the native kernel source.
Building your own kernel is not that hard. The first step is to make sure you have the kernel source installed on your system. Make sure that you installed the packages from the K series during the installation. You will also want to make sure you have the D series installed, specifically the C compiler, GNU make, and GNU binutils. In general, it's a good idea to have the entire D series installed if you plan on doing any kind of development. Now we are ready to build a kernel:
$ su - Password: # cd /usr/src/linux |
The first step is to bring the kernel source into its base state. We issue this command to do that:
# make mrproper |
Now you can configure the kernel for your system. The current kernel offers three ways of doing this. The first is the original text-based question and answer system. It asks a bunch of questions and then builds a configuration file. The problem with this method is that if you mess up, you must start over. The method that most people prefer is the menu driven one. Lastly, there is an X-based kernel configuration tool. Pick the one you want and issue the appropriate command:
# make config (text-based Q&A version) # make menuconfig (menu driven, text-based version) # make xconfig (X-based version, make sure you are in X first) |
Figure 4-1. The menu-driven kernel configuration program.
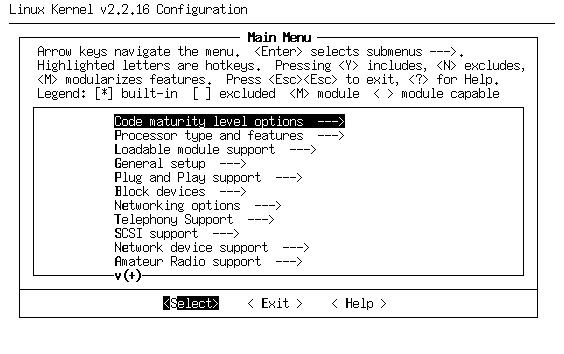
New users will probably find menuconfig to be the easiest to use. Help screens are provided that explain the various parts of the kernel. After configuring your kernel, exit the configuration program. It will write the necessary configuration files. Now we can prepare the source tree for a build:
# make dep # make clean |
The next step is to compile the kernel. First try issuing the zImage command below. That will fail if your kernel is too large. Don't worry, you can still build it with the bzImage command.
# make zImage (try this first) # make bzImage (if make zImage fails, issue this command) |
This may take a while, depending on your CPU speed. During the build process, you will see the compiler messages. After building the kernel image, you will want to build any parts of the kernel that you flagged as modular.
# make modules |
We can now install the kernel and modules that you compiled. To install the kernel on a Slackware system, these commands should be issued:
# mv /vmlinuz /vmlinuz.old # cat arch/i386/boot/zImage > /vmlinuz # mv /boot/System.map /boot/System.map.old # cp System.map /boot/System.map |
Replace the zImage with bzImage if you had to build a big kernel. You will want to edit /etc/lilo.conf and add a section to boot your old kernel in case your new one does not work. After doing that, run /sbin/lilo to install the new boot block. You can now reboot with your new kernel.
Using Kernel Modules
Kernel modules are another name for device drivers that can be inserted into a running kernel. They allow you to extend the hardware supported by your kernel without needing to pick another kernel or compile one yourself.
Modules can also be loaded and unloaded at any time, even when the system is running. This makes upgrading specific drivers easy for system administrators. A new module can be compiled, the old one removed, and the new one loaded, all without rebooting the machine.
Modules are stored in the /lib/modules/<kernel version> directory on your system. They can be loaded at boot time through the rc.modules file. This file is very well commented and offers examples for major hardware components. To see a list of modules that are currently active, use the lsmod(1) command:
# lsmod Module Size Used by parport_pc 7220 0 parport 7844 0 [parport_pc] |
You can see here that I only have the parallel port module loaded. To remove a module, you use the rmmod(1) command. Modules can be loaded by the modprobe(1) or insmod(1) command. modprobe is usually safer because it will load any modules that the one you're trying to load depends on.
A lot of users never have to load or unload modules by hand. They use the kernel autoloader for module management. All you have to do is uncomment the /sbin/kerneld(8) line in /etc/rc.d/rc.modules and the autoloader will start up. It will take care of loading and unloading modules as you request them. A request just involves trying to access that device.
More information can be found in the man pages for each of these commands, plus the rc.modules file.